ECR Cost Optimization: Save On Your Container Image Storage

Container images stored in AWS ECR can quickly add up in cost if not managed carefully. With storage fees calculated per GB-month and additional charges for API requests, even small inefficiencies can lead to significant expenses over time. This article outlines actionable strategies to perform ECR cost optimization (how to trim costs while keeping your image storage lean and efficient).
Understanding ECR Cost Drivers
Your ECR costs can add up quickly due to several factors. Large images, duplicate layers, and outdated builds all push up your bill. Recognizing these drivers is the first step toward cutting unnecessary spending.
Key ECR cost factors include:
• Accumulated Outdated Images: Old builds and unused tags that still take up storage space.
• Duplicate Layers: Inefficient image builds that miss out on caching and reuse.
• Inefficient Repository Management: Multiple repositories or poorly organized images lead to redundant data and confusion.
Knowing these elements helps you analyze usage patterns and track storage growth. This insight sets the stage for targeted ECR cost optimization.
Implementing Image Lifecycle Policies
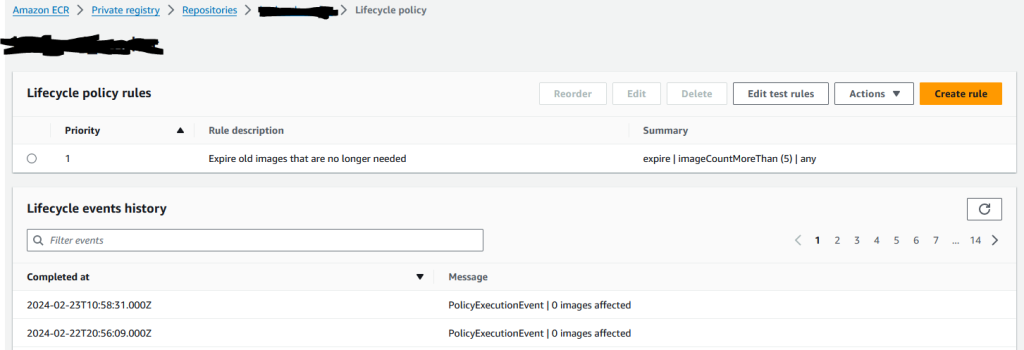
One of the most effective ways to manage ECR costs is by using lifecycle policies. These policies automatically remove old or untagged images, ensuring that only the necessary images remain in your repository. This approach reduces storage costs and streamlines repository management.

Consider these tactics when setting up lifecycle policies:
• Define Retention Rules: Delete images older than a specified number of days or those that do not match production tag patterns.
• Target Untagged Images: Automatically purge images that are untagged or designated as temporary builds.
• Schedule Regular Cleanups: Run cleanup processes during low-traffic periods to minimize disruption.
Implementing robust lifecycle policies ensures that your repository remains current and clutter-free, leading to measurable cost savings over time.
Best Practices for ECR Repository Management
Managing your container images well is key to successful ECR cost optimization. Using the same image in every environment simplifies operations and cuts down on wasted storage. When you standardize images across development, staging, and production, you also reduce maintenance efforts and save money.
Here are some ECR cost optimization best practices to consider:
• Use a Single, Consistent Image: Rely on one container image for development, staging, and production. This practice avoids storing multiple versions that serve the same purpose.
• Avoid Duplication Across AWS Accounts: Rather than copying images between accounts, keep them in a central repository or share access securely. This approach prevents unnecessary copies and reduces clutter.
• Implement Consistent Tagging: Apply clear, descriptive tags that indicate the version, environment, and status of your images. Consistent tagging makes images easier to find and manage.
• Consolidate Repositories: Merge similar repositories when possible. Combining them helps eliminate duplicates and simplifies overall management.
• Regular Auditing: Periodically review your repositories to remove outdated or unused images. Routine cleanup ensures that only necessary images take up storage.
Using these practices reduces complexity and keeps your storage efficient and cost-effective.
Automating Lifecycle Policies with Terraform
Automation can be a game changer for managing ECR lifecycle policies and helps ensure the best results when performing ECR cost optimization. Instead of manually applying policies across repositories, you can use Terraform to enforce consistency and scalability. The following Terraform trick applies lifecycle policies to all repositories, except for those you want to exclude, ensuring your policies are uniformly implemented.
Before you begin, define a list of repositories you wish to exclude. Then, fetch all repositories and apply the lifecycle policy only to those that are not excluded. This approach helps you avoid accidental removal of critical images while automating cleanup for the rest.
# Define a list of repository names to exclude from the lifecycle policy
locals {
  exclude_repos = ["repo-name-1", "repo-name-2"] # Add the repositories you want to exclude here
}

# Data source to fetch all ECR repositories
data "aws_ecr_repositories" "all" {}

# Apply lifecycle policy only to repositories not in the exclusion list
resource "aws_ecr_lifecycle_policy" "ecr_policies" {
  for_each = {
    for repo in data.aws_ecr_repositories.all.repositories :
    repo.repository_name => repo
    if !(repo.repository_name in local.exclude_repos)
  }

  repository = each.key

  policy = jsonencode({
    rules = [
      {
        rulePriority = 1,
        description  = "Expire untagged images older than 30 days",
        selection    = {
          tagStatus   = "untagged",
          countType   = "sinceImagePushed",
          countUnit   = "days",
          countNumber = 30
        },
        action = {
          type = "expire"
        }
      },
      {
        rulePriority = 2,
        description  = "Retain only the latest 10 tagged images",
        selection    = {
          tagStatus     = "tagged",
          tagPrefixList = [""],
          countType     = "imageCountMoreThan",
          countNumber   = 10
        },
        action = {
          type = "expire"
        }
      }
    ]
  })
}
Automating these policies with Terraform ensures that your cleanup process is repeatable and error-free. This not only saves time but also helps maintain consistency across your repositories, keeping your storage costs in check.
Final Thoughts: Successful ECR Cost Optimization
Optimizing your ECR storage is the most effective way to lower costs while keeping your container image repository running smoothly. When you understand cost drivers, use automated lifecycle policies, and follow proven repository management practices, you can cut unnecessary expenses with ease.
Take charge of your container image storage by putting these strategies into practice today. Explore our other guides like 14 common cost optimization mistakes for more tips on AWS cost optimization and learn how to simplify your cloud expenses even further. Enjoy optimizing, and here’s to building a leaner, more agile container environment!
We hope this article helped you in your ECR cost optimization journey, if you have any questions or comments please feel free to reach out below!